9-5 A/C BLEND DOOR REPAIR
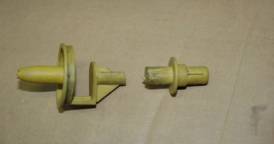
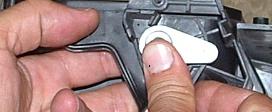
The shaft that connects the stepper motor to the blend door fails as shown.
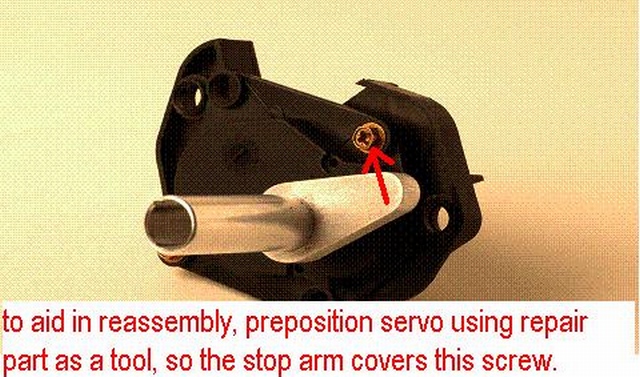
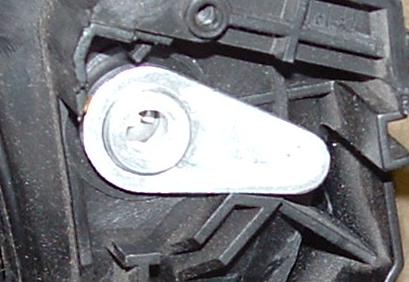
The original repair part , manufactured from aluminum, is shown attached to the servo above. Currently we are shipping a molded part made of aluminum and plastic as it significanty reduced assembly time for us. Passenger side repair parts may be all plastic, depending upon availability. To facilitate reassembly, it is a good idea to index the stepper motor. We suggest you use the repair piece as a tool to rotate the stepper motor shaft. Refer to the picture above. You will want to position the stop arm over the screw that is shown just to the left of the stop arm in the picture. Be aware that it takes quite a bit of torque to get the stepper motor to start turning, but once it starts to move, it goes easier.
BUY HERE
Without the new process 10 to 15 hours of labor is required to remove and replace the heater box.
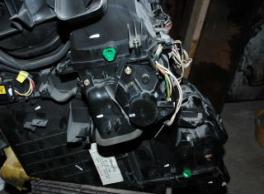
The new process can be completed in the vehicle in approximately 1 hour. First one must gain access to the servomotor by removing the lower dash cover on the affected side. The process shown is for the left side. Remove the servomotor, temp sensor, and vent “elbow". Next remove the “stop lever” by pressing down slightly on the lock tab and pulling it straight off. If the stop lever is missing don’t worry about it, as it is integral to the New repair part.
Reach inside the case, removing the broken shaft from within. This is not easy, repositioning blend door may help, and you will have to press pretty hard sometimes. Another option is to use a hacksaw blade to cut off the servo end of the yellow shaft, so it does not need to go so far into the case to clear.
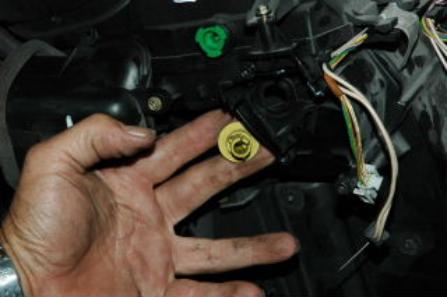
If you have not done so already, "clock the servo motor" by following the directions at the second picture above. Then insert the NEW ALUMINUM REPAIR PIECE IN THE SAME FASHION AS SHOWN HERE, supporting the bellcrank area of the blend door shaft with your left hand. Rotating the yellow blend door shaft clockwise, may help, and sometimes holding it in place with a pick helps when attempting to index the parts.
Then, While supporting the other part of the broken shaft from within the case, press the two parts together.
Reinstall “elbow”, and stepper motor. Replace any covers removed. NOTE: Be aware that the green bushing in the picture at the top of the page also fails. It is part number 4869244. The replacement is white. Most 2000 and later cars have the white ones. SEE Service Bulletin 854-2461 for details.
Clear the codes in the ACC system using the Tech 2 tool and recalibrate the system. If you do not have a Tech 2 just recalibrate by pressing auto and off simultaneously. Make sure the recirculate door operates correctly and that the system is full of refrigerant, because your customer has no idea how many different ways the air conditioner can fail. The link arm for the recirculate door breaks on occasion. Its part number is 4869426. No TECH 2 On calibration the left side of the display will indicate the number of faults, 0-23 and the right side will provide a fault code. 6, 7, and 8 are associated with the left blend door. 6 is an open or short in the stepper motor, 7 is a jammed blend door or motor, and 8 means the shaft is broken. This is the code you will usually see when you need this kit. The right side codes are 9, 10, and 11 respectively. You may or may not get a code 21 associated with the recirculate door link arm. ?s, call 8003260599. © intellect corp. all rights reserved. BUY HERE